Import Contacts
Importing Contacts is a three-step process:
Step 1: Choose the Data Source
Step 2: Match Fields
Step 3: Preview
Step 1: Choose the Data Source
Login: Log in as a Super Admin or Company Admin.
Click on "Import Contacts" under the Contacts menu. This will redirect you to a page from where you can “Choose a data source” to import the contacts.
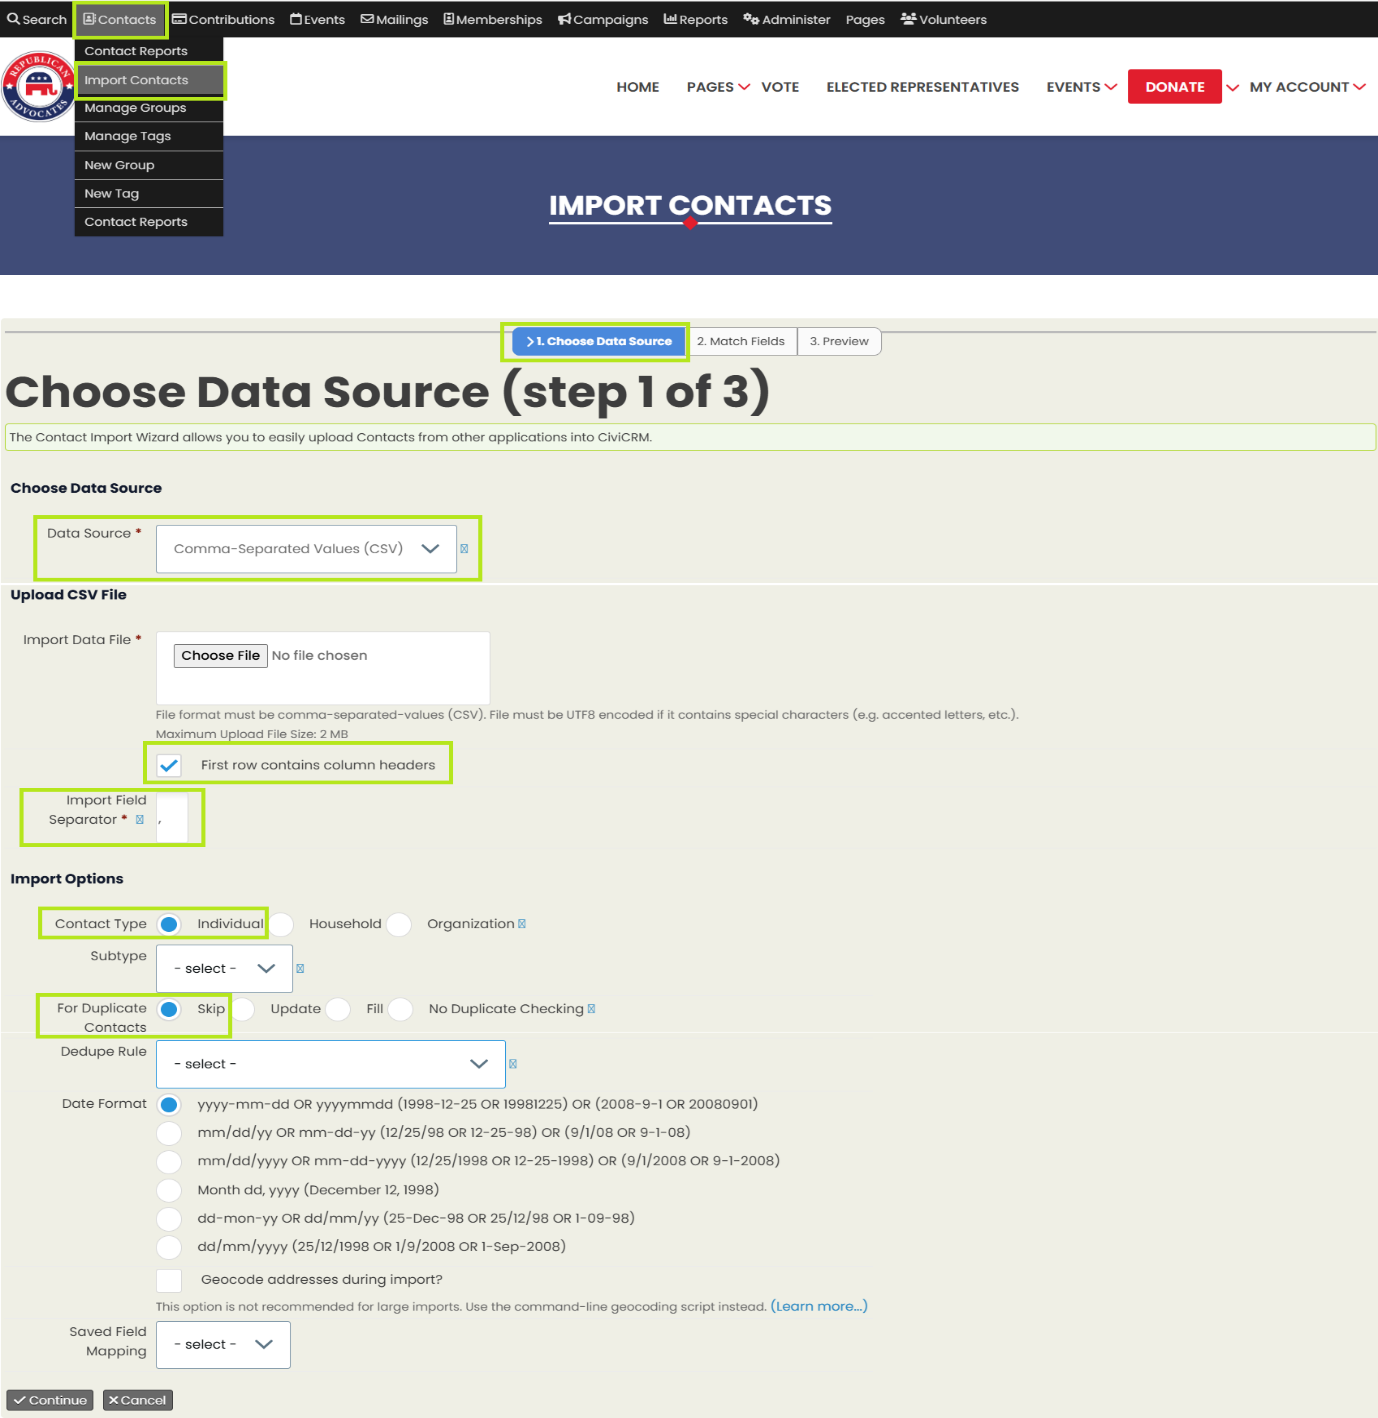
Note: We will use a CSV file as the data source to import the contacts.
Select “Comma-Separated Values (CSV)” from the data source dropdown and upload the CSV file using the upload option.
If the CSV contains column headers in the first row, check the “First row contains column headers” checkbox.
Specify “Comma” as the Import Field Separator.
Now we need to provide/select options given in “import options”:
Select "Individual" from the Contact Type options.
Select “Skip” in the import options block to avoid duplicate contacts.
Click on the continue button. After providing the details, the user will be redirected to the match field tab to map the fields of the CSV with CRM.
Step 2: Match Fields
On this tab, the user needs to map the CSV file columns with the CRM columns as shown below.
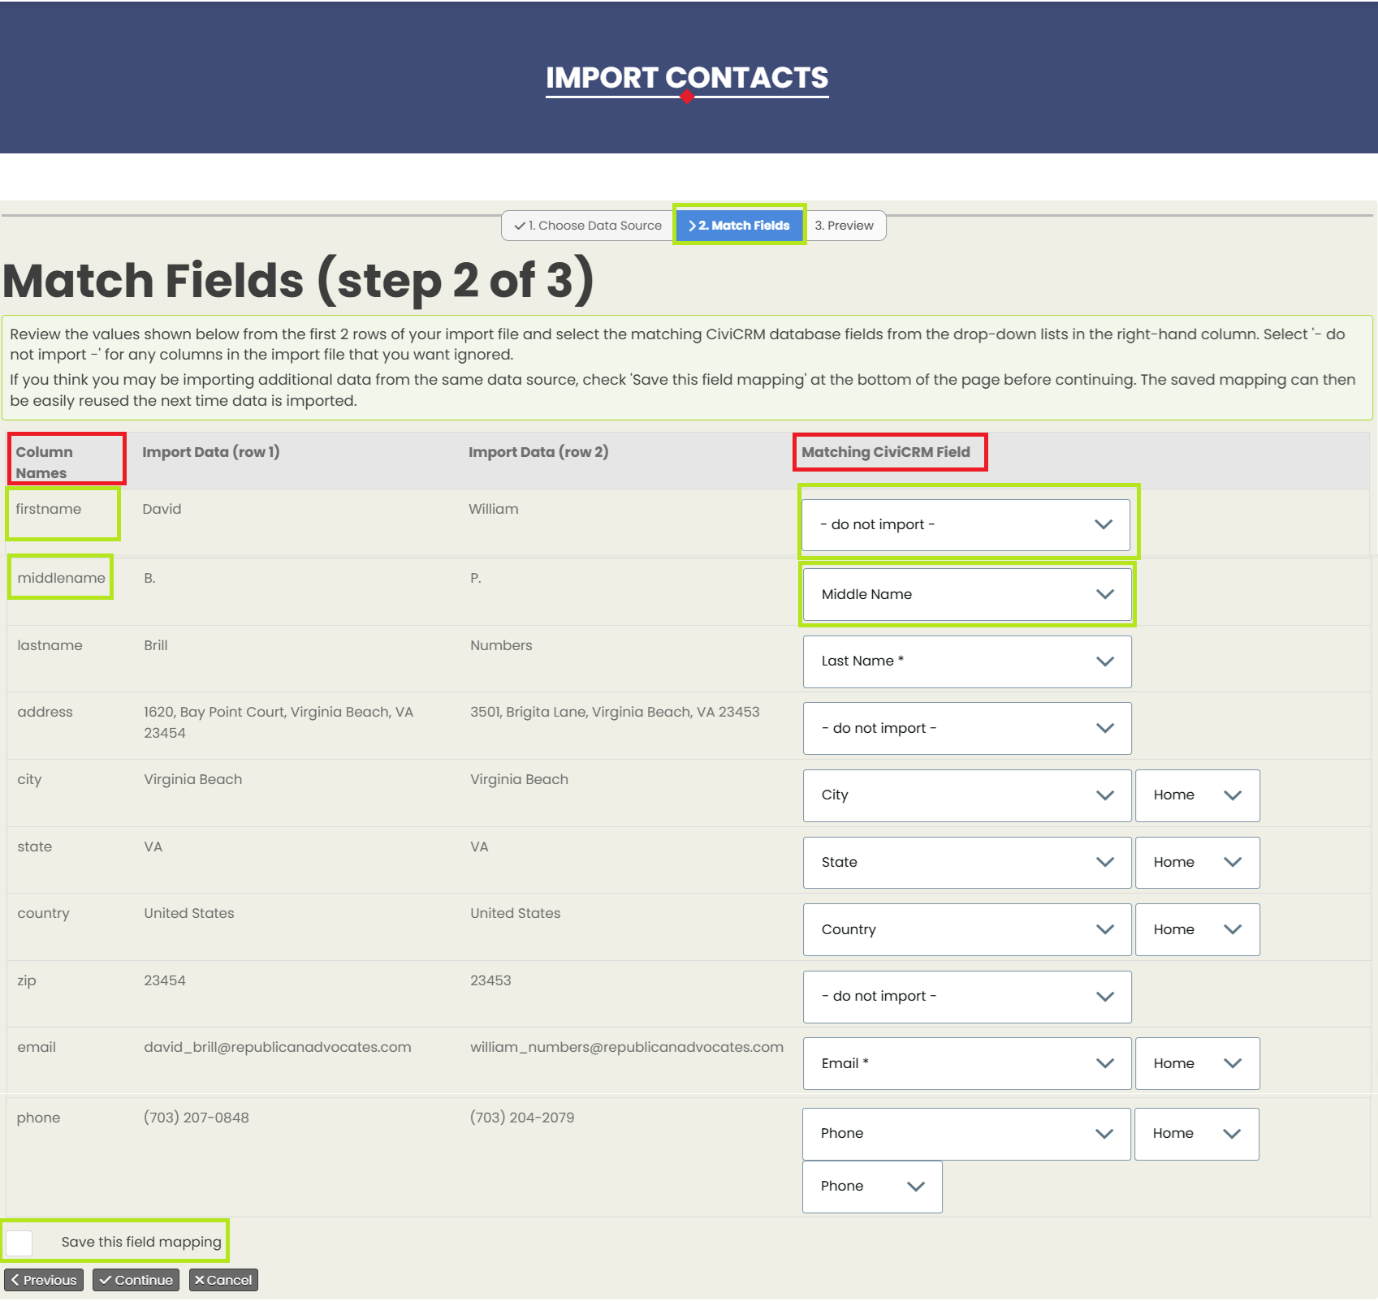
The left side marked section showing CSV file column and right-side marked section showing CRM column.
To use the same mapping in future, check the “Save the field mapping” checkbox.

Click on the continue button. After mapping the fields, the user will be redirected to the preview tab to ensure the mapping result.
Step 3: Preview
Users can preview the results of importing data in CRM. Review the totals to ensure that they represent expected results.
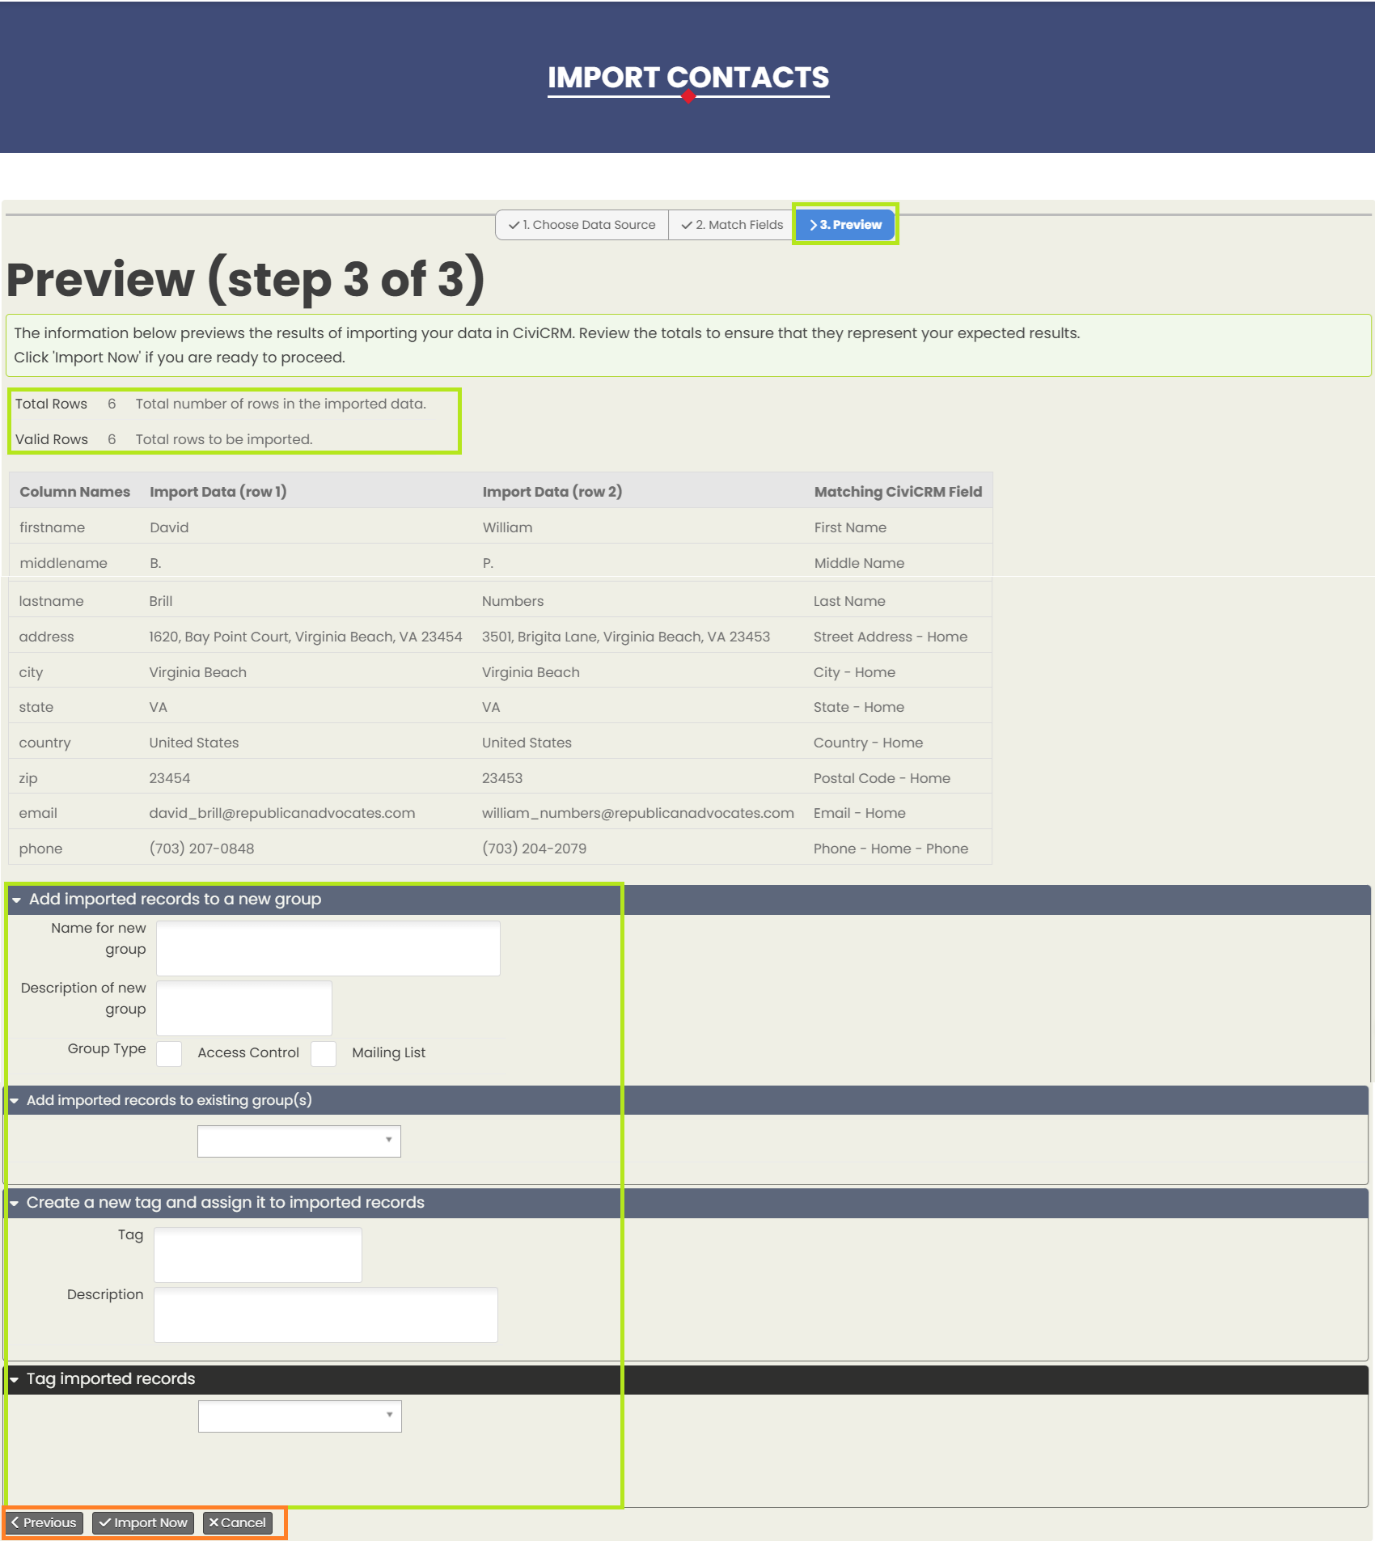
If a user wants to associate imported contacts with any existing or new group, the following options are available:
Existing Group: You can select from a list of existing groups to associate the imported contacts with one of them.
New Group: You have the option to create a new group and associate the imported contacts with this new group.
If a user wants to associate imported contacts with a new tag, the following option is available:
New Tag: You can create a new tag and associate the imported contacts with this new tag. This allows you to categorize and manage your contacts effectively.
These options ensure that your imported contacts are organized efficiently based on your requirements.
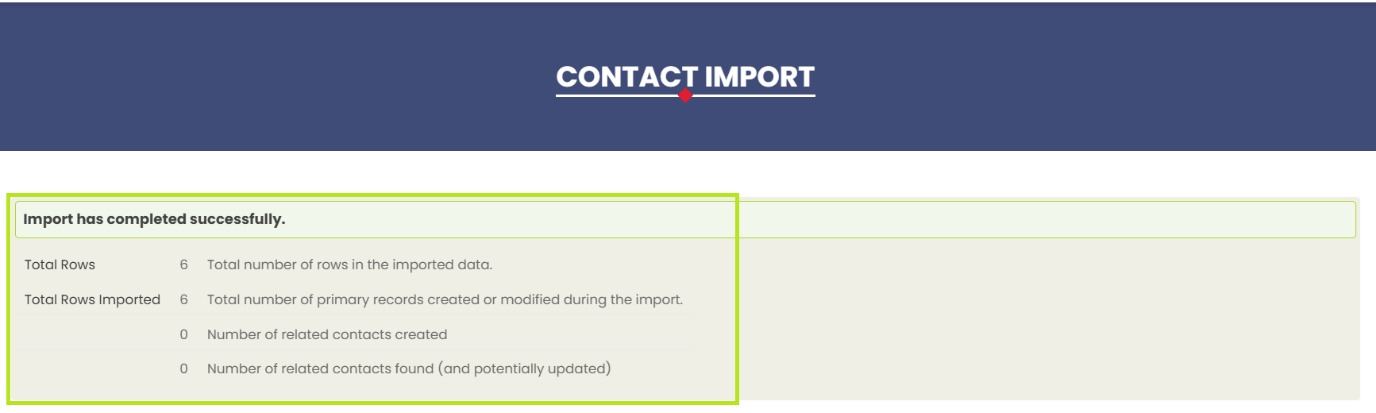
Click “Import Now” button, if ready to proceed.
User will re-direct to below screen with summary of result.