New Tag Creation and Assignment
Tags - Tags in CRM are labels that you can assign to contacts, activities, or other entities. They help categorize and filter records for easy management and reporting.
How to create a Tag:
Log in to the application using “super admin” or “company admin” credentials.
Navigate to “New Tag” option under the “Contacts” menu.
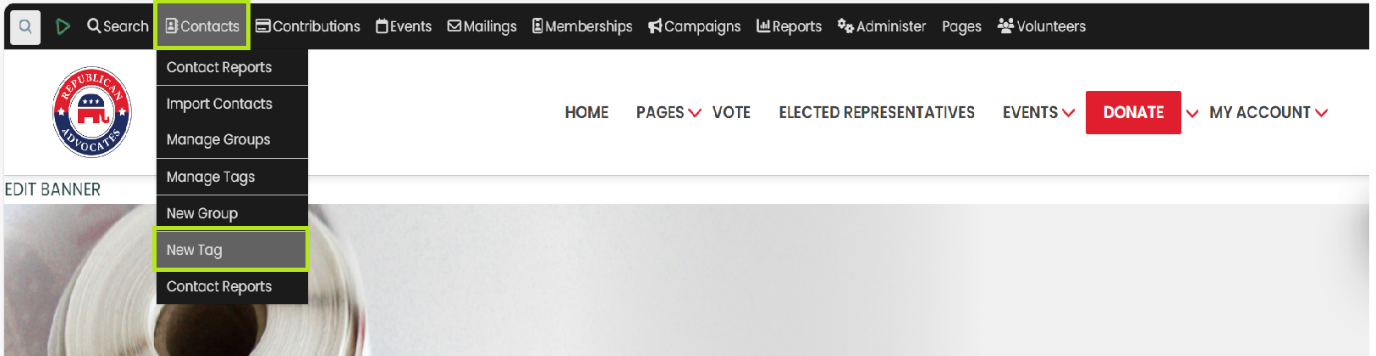
Click on "New Tag" menu item, it will redirect you to a page from where you can create a new Tag.
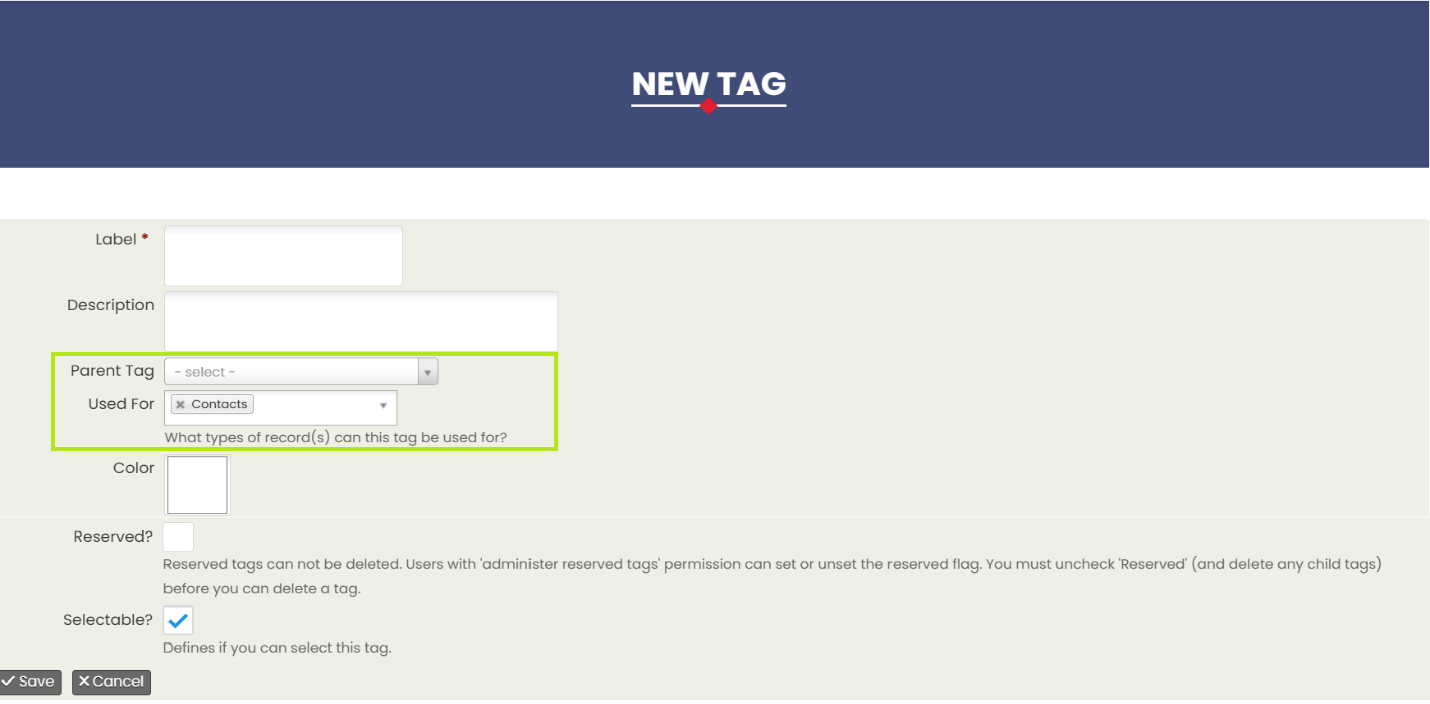
Fill in the tag “Label” and “Description”.
Select “Parent Tag” value from the dropdown (Optional), if you want to create a tag under any other pre created tag.
Select “Used For” value from the dropdown (Optional), if you want to define.
You can assign the “Color” to a tag from “Color” option.
Click on “Save” button to save.
Note: You can use tags with groups to create more specific lists of contacts.
For example, if you have a group of “event attendees”, you can tag some of them as "VIP" to quickly identify and manage the VIPs within that group.
How to assign Tags to Contacts:
Go to Search > Advance Search.
Search for the contacts you want to tag.
Select the contacts by checking the check boxes next to their names.
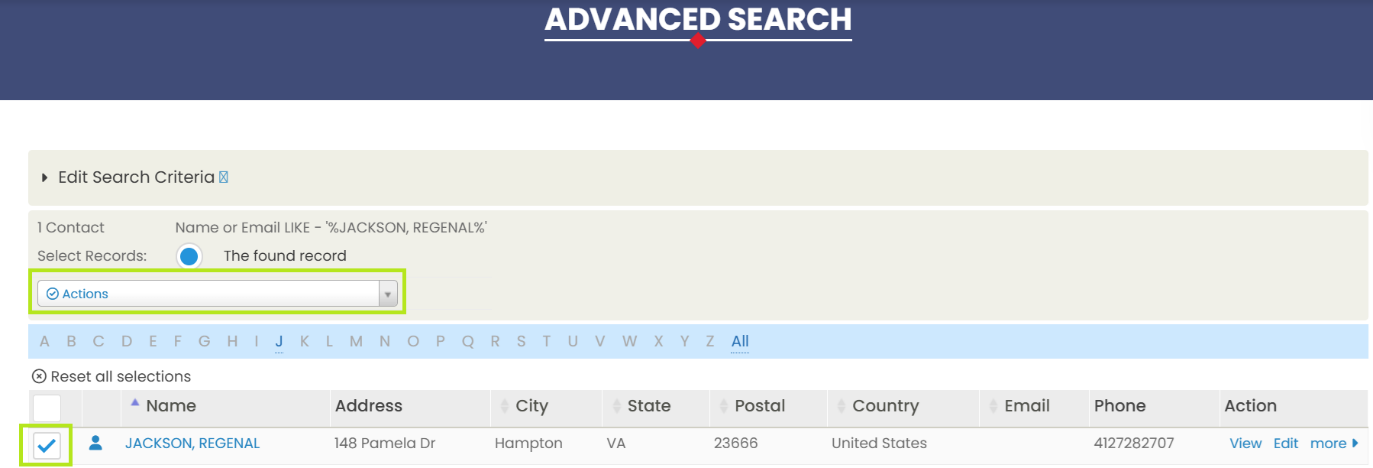
From the “Actions” dropdown, select “Tag–add to contacts”
It will redirect to a page to choose the desired tag(s) and click Tag Contacts button.
Using Tags for Filtering:
Goto to Search > Advanced Search.
In the search criteria, find the Tag(s) section.
Select the tag(s) you want to filter by and click Search.